MediaWiki-Vagrant
Using mw:MediaWiki-Vagrant, you can setup a development instance of MediaWiki in a snap. Specifically tuned for development of the MediaWiki software, you get all the tools needed to dive right in to coding and patching. To make it even easier to use, you can start off with https://github.com/dan-nl/mw-vagrant-prep
MediaWiki-Vagrant uses Puppet for configuration management and automation (not Ansible).
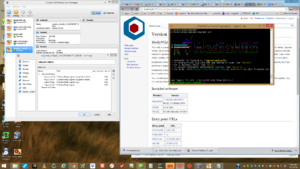
You'll notice in the screenshot that the VM comes pre-configured with shared folders to the host system so that you do not even need to SSH to the VM to see the puppet modules and logs. You can work right on these from your host system.

Engineering / Architecture edit
MediaWiki-Vagrant runs on HHVM[1][2] PHP7-FPM with Apache etc. Of course it all relies on Vagrant and VirtualBox
Meanwhile, current versions of VirtualBox have problems with running Guest Additions on Linux. This is but one ticket. There are tons of examples of breakage, and fixes haven't landed yet in a stable release. Current solution: run development? (I'm checking on compatibility)
Quick Tips edit
Be sure to check the documentation at mw:MediaWiki-Vagrant
- wiki login is 'Admin' 'vagrant'
- local shell user is 'vagrant' 'vagrant'
- ssh:
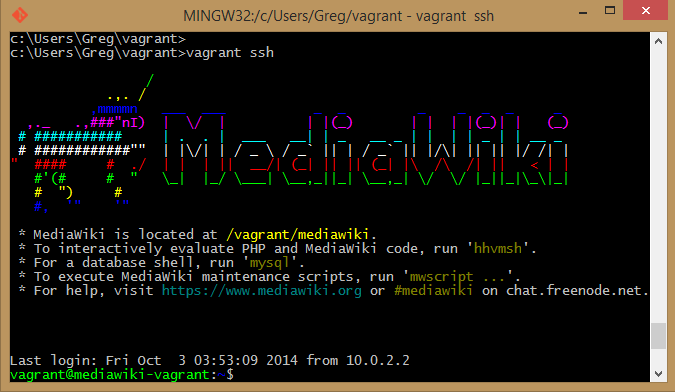
vagrant ssh
vagrant roles list To enable certain roles in your MediaWiki Vagrant: vagrant roles enable <role> -- provision Once you do this, and visit http://localhost:8080/wiki/Special:Version, you can check the product box showing the currently running versions of 'MediaWiki, PHP, MySQL, ICU' and extensions.
DNS edit
MediaWiki Vagrant docs will tell you to visit http://dev.wiki.local.wmftest.net:8080/wiki which is fine, because this specific domain routes to 127.0.0.1 (your local host). There's nothing you have to do with DNS. All three of the following are equivalent.
- http://localhost:8080/wiki/Special:Version
- http://127.0.0.1:8080/wiki/Special:Version
- http://dev.wiki.local.wmftest.net:8080/wiki/Special:Version
Deploy MediaWiki-Vagrant to Amazon edit
How to Deploy your MediaWiki-Vagrant instance to Amazon Web Services (AWS)
There is this article that explains how to do this, but I didn't want to create a separate VagrantFile. After not succeeding, I should probably go back and try that approach.
Using multiple providers (AWS, Rackspace, VirtualBox, VMWare) with the same virtual machine is not a feature of Vagrant. Supposedly this limitation will be removed in a future version of Vagrant. But there is a work-around that you can use to accomplish this -- by creating a multi-machine environment. We are describing that work-around. There are some "cheap" solutions that tell you to either delete, or rename the hidden .virtualbox directory in your project source. Don't do that. That's just deleting the information that you'd need for using the existing provider. Or, only do that if you are trying to permanently switch the provider used in your project -- which is not the case here. To get a fully compatible MediaWiki-Vagrant setup that works for both localhost VirtualBox deployments and cloud Amazon AWS deployments, then read on.
Caveats edit
The MediaWiki-Vagrant setup is designed for local development and NOT for security, so it may not be suitable for running in the cloud.
The MediaWiki-Vagrant box is setup with NFS shares. The Vagrant-aws plugin has nominal support for shared folders using rsync, so sharing the ~/vagrant folder might work, but it's unkown how well this works. And it's unknown exactly how to disable the synced folders in Vagrantfile-extra.rb that is defined in the Vagrantfile
Pre-requisites edit
AWS Account edit
You obviously need an AWS account, which you can get for free. So head over to Amazon and create one. You'll need to create a IAM user and a set of "Access" and "Secret" keys for this user at https://console.aws.amazon.com (Dashboard -> Users -> User Actions -> Manage Access Keys) Hint: if you want another user "Bob" to be able to login to your Amazon Console, they can't just use their email address. You'll want to create a "Login Alias" which is a custom URL for accessing Amazon e.g. https://example.signin.aws.amazon.com/console You also must assign Bob a password in IAM. Then Bob can signin at the Login Alias using the password that you gave him in IAM.
Console Tools edit
It may be helpful to have the command line tools for Elastic Cloud installed so that you can test your connection ability. For Ubuntu,
sudo apt-get install ec2-api-tools
ec2-describe-regions -v --auth-dry-run --aws-access-key KEY --aws-secret-key KEY
Rather than specifying your keys on the command line, you may want to set them in ~/.bashrc and source the file to bring them into your current shell session. [3]
export AWS_ACCESS_KEY=THISISJUSTANEXAMPLE
export AWS_SECRET_KEY=ThisIsNotARealSecretEnterYourSecretHere
Vagrant-AWS Plugin edit
You need the vagrant-aws plugin (https://github.com/mitchellh/vagrant-aws)
cd ~/vagrant
vagrant plugin install vagrant-aws
Status edit
When you do a vagrant status check of your current MediaWiki-Vagrant setup, you'll see something like this:
Current machine states:
default                   poweroff (virtualbox)
The VM is powered off. To restart the VM, simply run `vagrant up`
The machine is called default and the provider is virtualbox.
If your virtual machine is not powered off, then do so with vagrant halt
Boxes edit
The base box that is used at this time is Debian stretch (see also https://app.vagrantup.com/debian). If you vagrant up --provision an old box based on Ubuntu, then it will prompt you to destroy the existing box (so that it can re-provision with the right OS) vagrant destroy -f; vagrant up
Each 'box' in vagrant is specific to a provider, so we'll need to get a new box that will run on AWS.
vagrant box add dummy https://github.com/mitchellh/vagrant-aws/raw/master/dummy.box
vagrant box list
You need to create a custom stanza in Vagrantfile-extra.rb[4]
The items you'll need are:
- aws.access_key_id
- aws.secret_access_key
- aws.keypair_name
- aws.ami
To get the access_key_id and secret_access_key, you login to your AWS account. Here are the instructions http://docs.aws.amazon.com/AWSSimpleQueueService/latest/SQSGettingStartedGuide/AWSCredentials.html
To get the keypair_name, you need to create (or upload) a keypair into your AWS Console for the region. It's easy to create a keypair in the AWS console, and as soon as you do, it will prompt you to download the .pem file. Save the .pem file to your ~/.ssh/ directory, and ensure the file mode is 400
chmod 400 ~/.ssh/my-aws-keys.pemNeed to find the image (AMI) you want. You can search for Ubuntu images at http://cloud-images.ubuntu.com/locator/ec2/ The latest Ubuntu version used in MediaWiki-Vagrant as of March 2015 is Trusty-Tahr (or 14.04 LTS) You need to choose the region that you want to host in. So for example if you want to host in Oregon state, then you want the "US West" region for Amazon. Searching for "trusty 64 west" we can see several options for the AMD64 architecture
Instance Type hvm:ebs AMI-ID ami-a6b8e7ce
Customize Vagrantfile-extra.rb edit
I tried to customize the Vagrantfile-extra.rb but couldn't quite understand the required structure
# -*- mode: ruby -*-
# vi: set ft=ruby :
#
# Sample 'extra' configuration file for MediaWiki-Vagrant
# -------------------------------------------------------
# http://www.mediawiki.org/wiki/Mediawiki-Vagrant
#
# This file contains examples of some customizations you may wish to
# apply to your virtual machine. To use it, copy this file to its parent
# directory (i.e., the repository root directory).
#
# To apply a customization, uncomment its line by removing the leading
# '#'. Then save the file and run 'vagrant halt' followed by 'vagrant up'.
#
# Useful details about the structure and content of this file can be
# found in the Vagrant documentation, at:
# <http://docs.vagrantup.com/v2/vagrantfile/index.html>.
#
VAGRANTFILE_API_VERSION = "2"
Vagrant.configure(VAGRANTFILE_API_VERSION) do |config|

    config.vm.provider :virtualbox do |vb|
        # For a full list of options you can pass to 'modifyvm', see
        # <http://www.virtualbox.org/manual/ch08.html>.

        # Boot the VM in graphical mode:
        # vb.gui = true

        # Increase memory allocation from 768MB to 1GB:
        # vb.customize ['modifyvm', :id, '--memory', '1024']
        vb.customize ['modifyvm', :id, '--memory', '2048']

        # But limit the virtual machine to 1 CPU core:
        # vb.customize ['modifyvm', :id, '--cpus', '1']

        # Fix dns resolution problem
        vb.customize ['modifyvm', :id, '--natdnshostresolver1', 'off']
        vb.customize ['modifyvm', :id, '--natdnsproxy1', 'off']
    end

    # override the box used for MediaWiki-Vagrant with a box for AWS
    # we added this box at the command-line with
    # vagrant box add dummy https://github.com/mitchellh/vagrant-aws/raw/master/dummy.box
    config.vm.define "default_virtualbox"
    config.vm.define "default_aws", autostart:false do |default_aws|
      default_aws.vm.box = "dummy"
    end

    supported_providers = %w(virtualbox aws)
    active_provider = ENV['VAGRANT_ACTIVE_PROVIDER'] # it'd be better to get this from the CLI --provider option
    supported_providers.each do |provider|
      next unless active_provider.nil? || active_provider == provider
      config.vm.define "default_#{provider}" do |box|
        box.vm.provider :aws do |aws, override|
          aws.access_key_id = 'RedactedSecret'
          aws.secret_access_key = 'RedactedSecret'
          aws.keypair_name = "eqt-mw-keys"

          aws.ami = "ami-7747d01e"

          override.ssh.username = "ubuntu"
          override.ssh.private_key_path = "/home/greg/.ssh/eqt-mw-keys.pem"
        end
      end
    end


#     config.vm.provider :aws do |aws, override|
#         aws.access_key_id = 'RedactedSecret'
#         aws.secret_access_key = 'RedactedSecret'
#         aws.keypair_name = "eqt-mw-keys"
#
#         aws.ami = "ami-7747d01e"
#
#         override.ssh.username = "ubuntu"
#         override.ssh.private_key_path = "/home/greg/.ssh/eqt-mw-keys.pem"
#     end


end
Test or Run edit
When you're done with the customizations to the Vagrantfile-extra.rb
vagrant status
## status looks good?
vagrant up --provider=aws
Resources edit
This is the official 'response' to this issue. It offers a gist that supposedly addresses the problem of running multiple providers, but I wasn't able to figure out how to apply that to the MediaWiki-Vagrant setup.
There is a somewhat related issue in Phabricator that requests a web front-end to make deployment easier. https://phabricator.wikimedia.org/T53782
References edit
- ↑ mw:HHVM
- ↑ Facecrook announced in Sept. 2017 that HHVM would not aim for PHP compatibility in the future.1 After discussion2 WMF adopted a plan to migrate the WMF production cluster to PHP 7, first migrating appservers from Jessie to Stretch. Once that's done, HHVM support will likely be dropped from MediaWiki (exact details tbd). See task T176209.
- ↑ For some reason, this didn't work for me the first time, so I regenerated keys, and it worked.
- ↑ Don't edit Vagrantfile since that is distributed by MediaWiki-Vagrant and you won't be able to upgrade your environment
